Usability Test Plan - Layer 3
Printed From: One Stop Testing
Category: Software Testing @ OneStopTesting
Forum Name: Test Plans @ OneStopTesting
Forum Discription: Discuss, Learn and Prepare better and better Test Plans for yourself.
URL: http://forum.onestoptesting.com/forum_posts.asp?TID=109
Printed Date: 09Jan2025 at 4:43pm
Topic: Usability Test Plan - Layer 3
Posted By: priya
Subject: Usability Test Plan - Layer 3
Date Posted: 19Feb2007 at 2:09pm
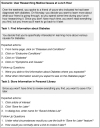
Layer 3: Adding Further DetailYou may have seen tests that go into even more detail than described in the first two layers. In some cases, this information is important because it reflects a larger-scale test. In other cases, the value of this information is measured only by your team's and client's need to have it spelled out. BackgroundYour test plan can provide an overview of the project and the product being tested. The background describes the purpose of the product and offers a high-level business case for it. This section of the test plan can be used to rationalize the testing, or describe the design process to date. There are two main purposes to this content: First, it makes the plan internally comprehensive, a stand-alone document. Second, background information helps make stakeholders who care about this sort of thing more comfortable with usability testing. If you don't have a need for either of these, the background section may not be essential to conducting a good usability test. Functional DetailsIf you are testing a prototype of the site you may need to provide instruction to the facilitator that describes how it should behave during the test. Prototypes are notorious for being hopelessly incomplete at the time of testing and the facilitator can easily misstep if not adequately prepared. In a test plan, the functional details should be embedded in the script adjacent to the relevant scenarios. javascript:popUp%28%27/content/images/chap3_9780321392350/elementLinks/03fig04.gif%27%29 - Figure 3.4 shows how functional details might be embedded with the rest of the script. 
For example, in running a test on an internal web application designed to support a specific business process, the facilitator will need some direction about how the application is supposed to behave. For a scenario where the user needs to check on incoming responses from users, the test plan might include directions like: "The user must click the checkboxes next to the incoming responses before clicking 'Export to Text File'. Clicking this button before selecting responses will lead to an error." Expected BehaviorsIn addition to functional details, the script may also include notes to the facilitator describing the expected response from the participant. This helps the facilitator gauge whether the participant is going in the right direction. Depending on your methodology, you may want the facilitator to steer participants right if they stray too far off course. Of course, expected behaviors should appear adjacent to the relevant scenarios. At the same time, they should be formatted to distinguish them from the part that gets read aloud to the participant. (Giving them the answer during the course of the test just wouldn't be fair, would it?) Depending on the facilitator's comfort level with the prototype, you may need to be very explicit about the expected behaviors. Table 3.1. Comparing Explicit and Non-Explicit Expected Behaviors
|